Label in Moodle can be defined as the spacer which is used to add multimedia elements like text, images, video codes and display code from Web 2.0 widgets on the Moodle homepage. It is normally used to give a quick instruction for telling learner what to click next.
Labels are widely used by Moodle Course Editors to improve the aesthetic appearance of the course.
Why use it?
• Label are used to put sensitive information such as a Module/Reading titles, notes, clarifications, etc.
• Labels are used to organize the Moodle course homepage and to provide directions for the learners to understand the information available to them.
• It is used to include multimedia elements such as Text, Audio and Video elements into the course homepage.
• It helps the course to become more accessible.
Should I use Page or a Label in Moodle ?
It depends on your content. If you are having too much content to be displayed on the page and the learner has to scroll in order to view the content, then you can select Page as the option. If you are having short items of content such as Photo, Description, Video or Text, then you can use Label as it conveys the information to
the learner and prevents the learner to click on another link in order to view the content.
Tips for using Labels in Moodle:
• Avoid adding more multimedia elements into the homepage as it could slow down the loading.
• Avoid adding more than 1 video per page.
• Use heading consistency with the same Text, Font size and font color so that it helps to maintain consistency across the sections and helps the learner to be familiar.
• Make sure the heading are not not too small or large, use the correct heading level to help learners in reading the text.
• Avoid using bold text if you are using screen readers.
• Name each section properly by using appropriate labels.
• Whenever you are including any documents and links always include a context or explanation of why to use this document.
• If you are having multiple documents on a single topic, place it across a single folder.
• Ensure the multimedia elements are relevant to the topic if not it can be distracting.
• Avoid using large context or information in Label.
Dimension Recommendations for Labels : Source
• For Thumbnail-sized images keep the pixel dimension (100 – 200 Pixels wide or less)
• For illustrations you can use smaller version and the pixel dimension ( 250 – 400 pixels wide).
• For adding Banners to the Summary in top section of your course page, keep the pixel dimension as 425 pixels wide and less than 100 pixels.
• For adding image to an HTML block it should not be more than 175 pixels wide.
• If the images are larger than 450 pixels it might be too large and the learners will have to scroll down horizontally to view the page content. By using Moodle HTML Editor you can resize the image in moodle.
Size Images Guidelines :
You can use the recommended guidelines to prevent extra scrolling and slowdown of the course page
Note :
In order for the page to load faster consider resizing the images before uploading to the course.
How to add labels to your course?
Step 1 :
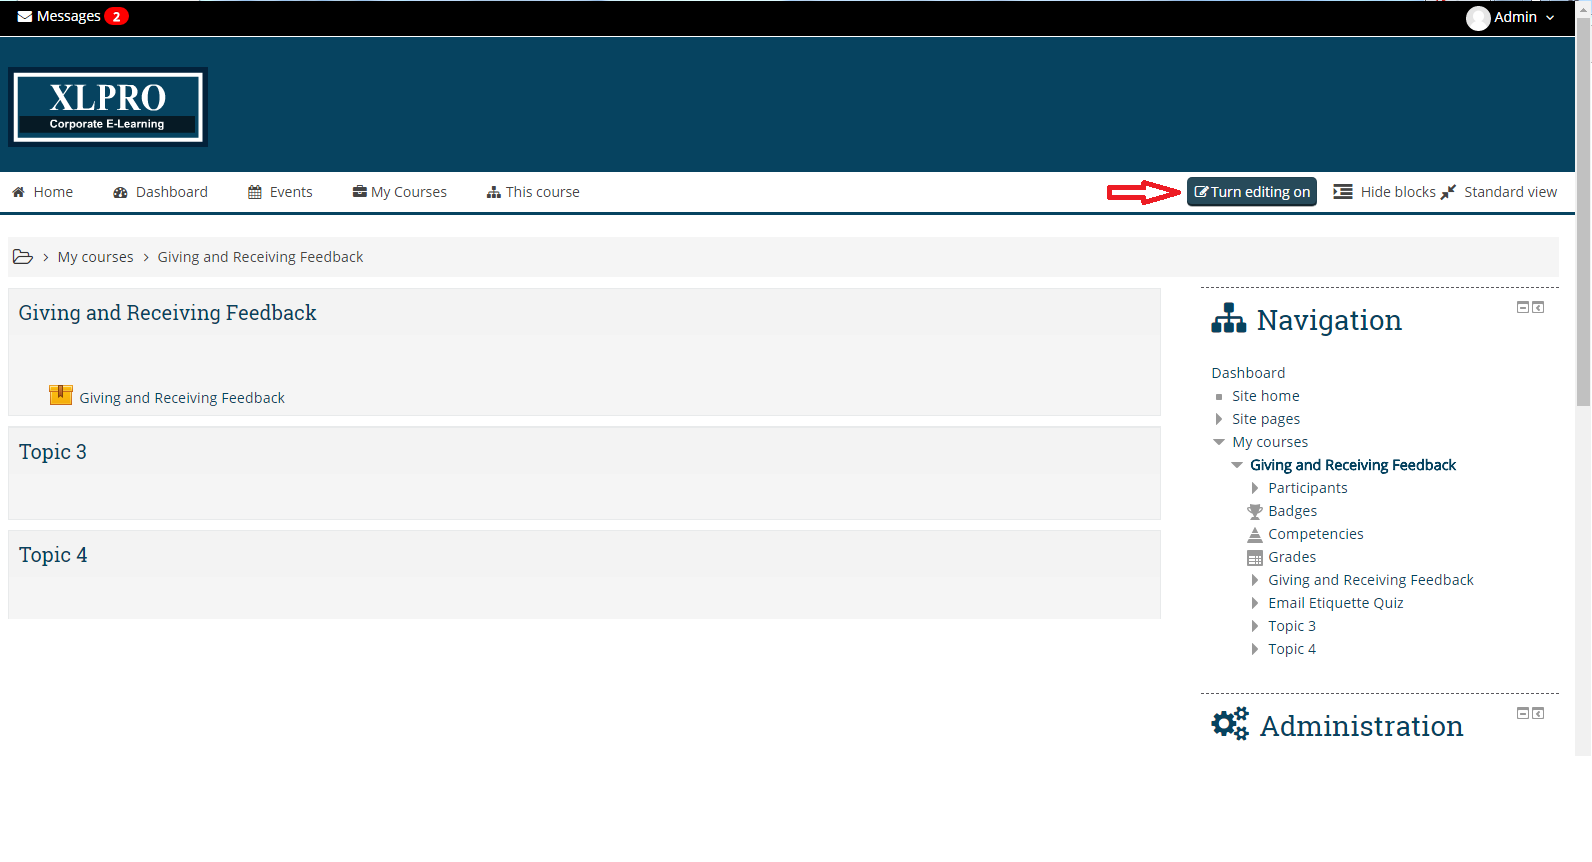
In the main page, “Turn Editing On”
Step 2 :
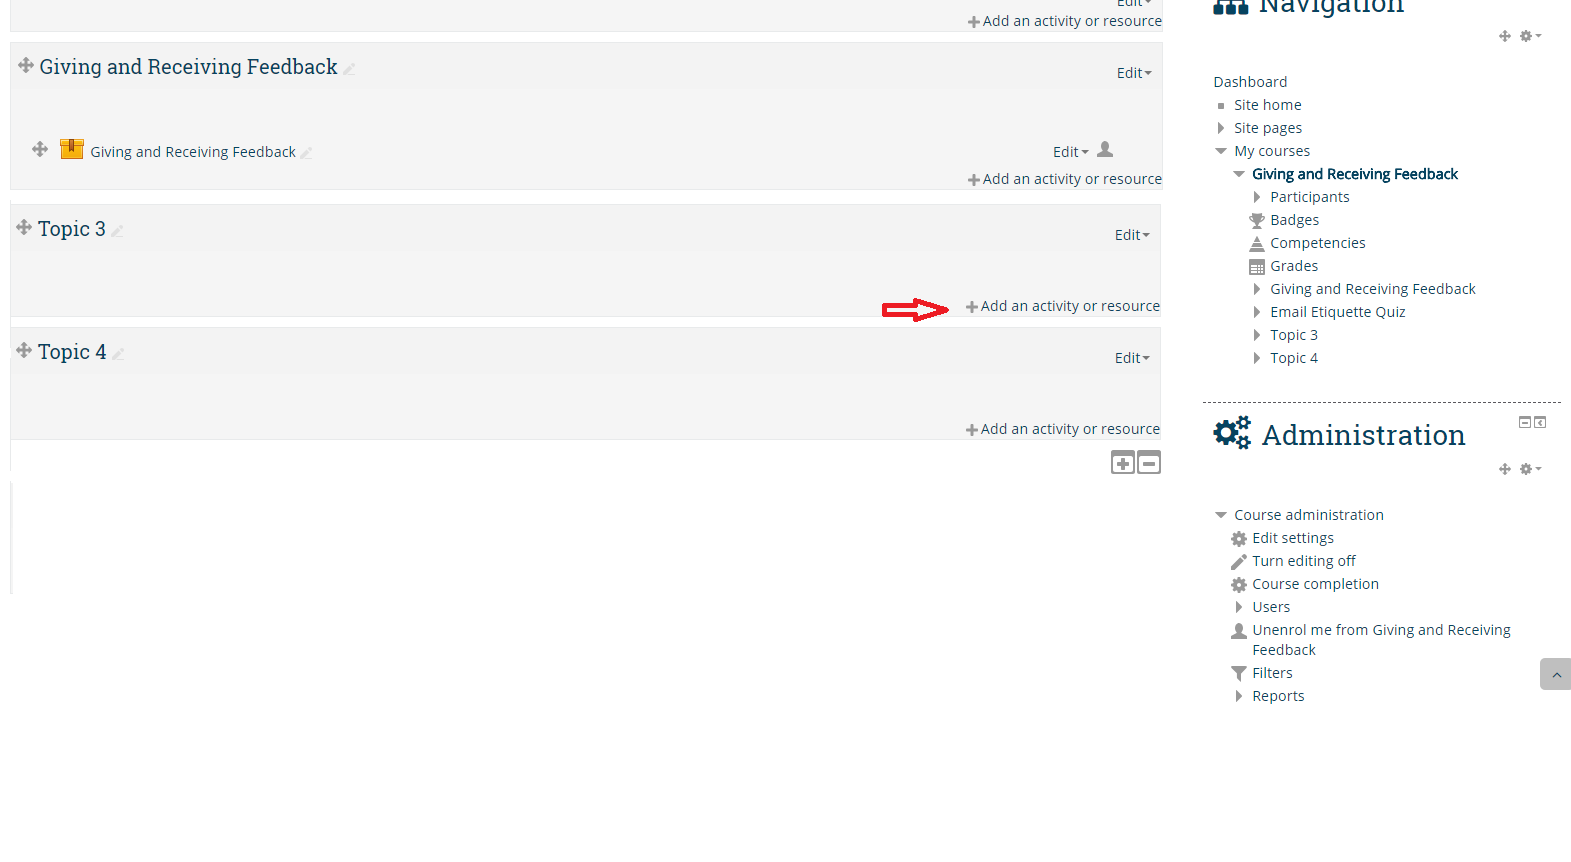
Go to the topic where you have to add label and select “Add activity or resource” option
Step 3 :
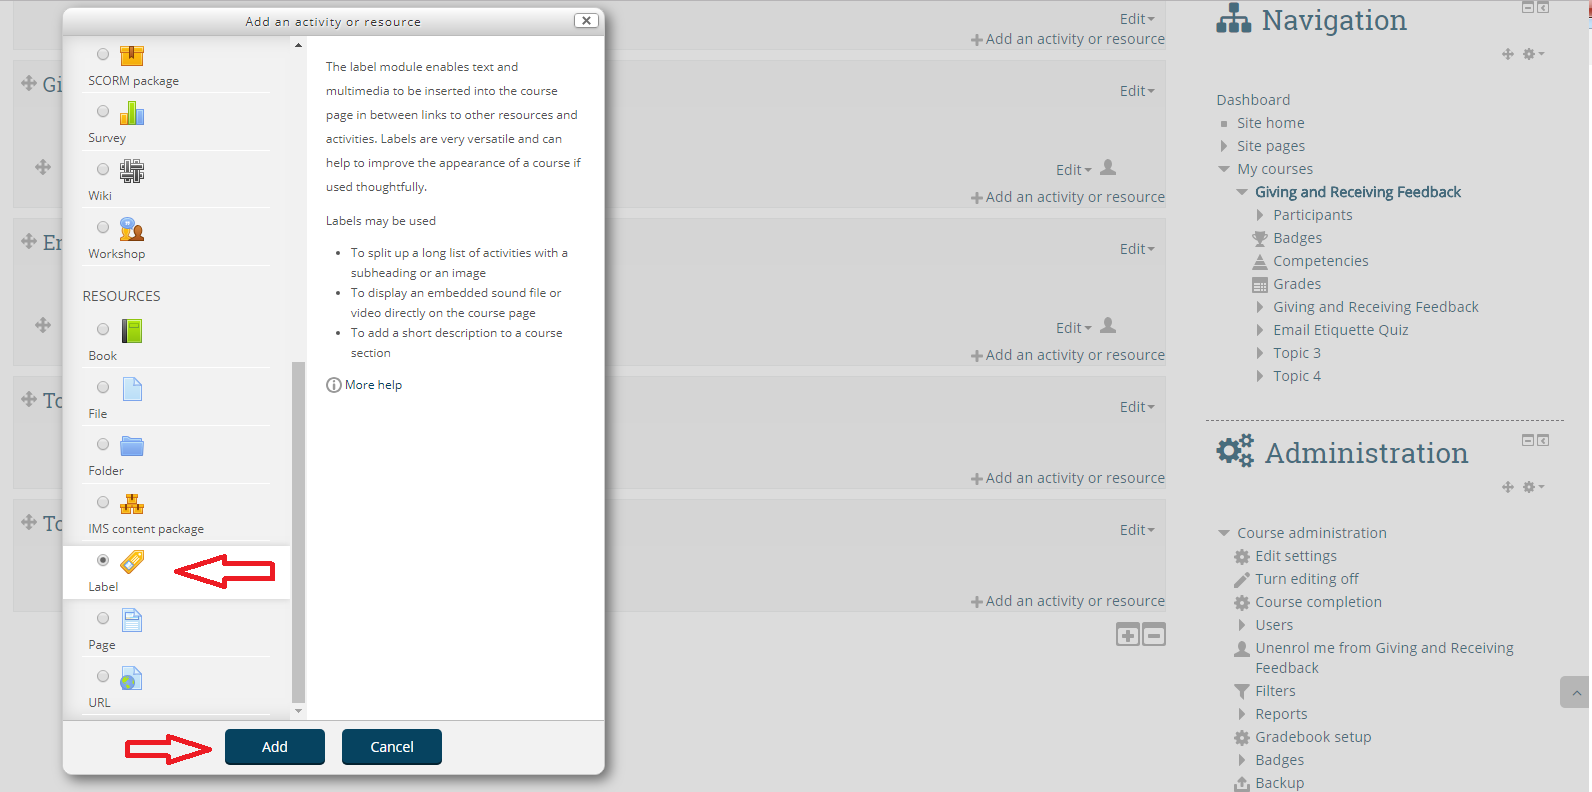
After selecting “Add activity or resource” you will get a window as shown above. Click on “Label” option in order to input the label.
Step 4 :
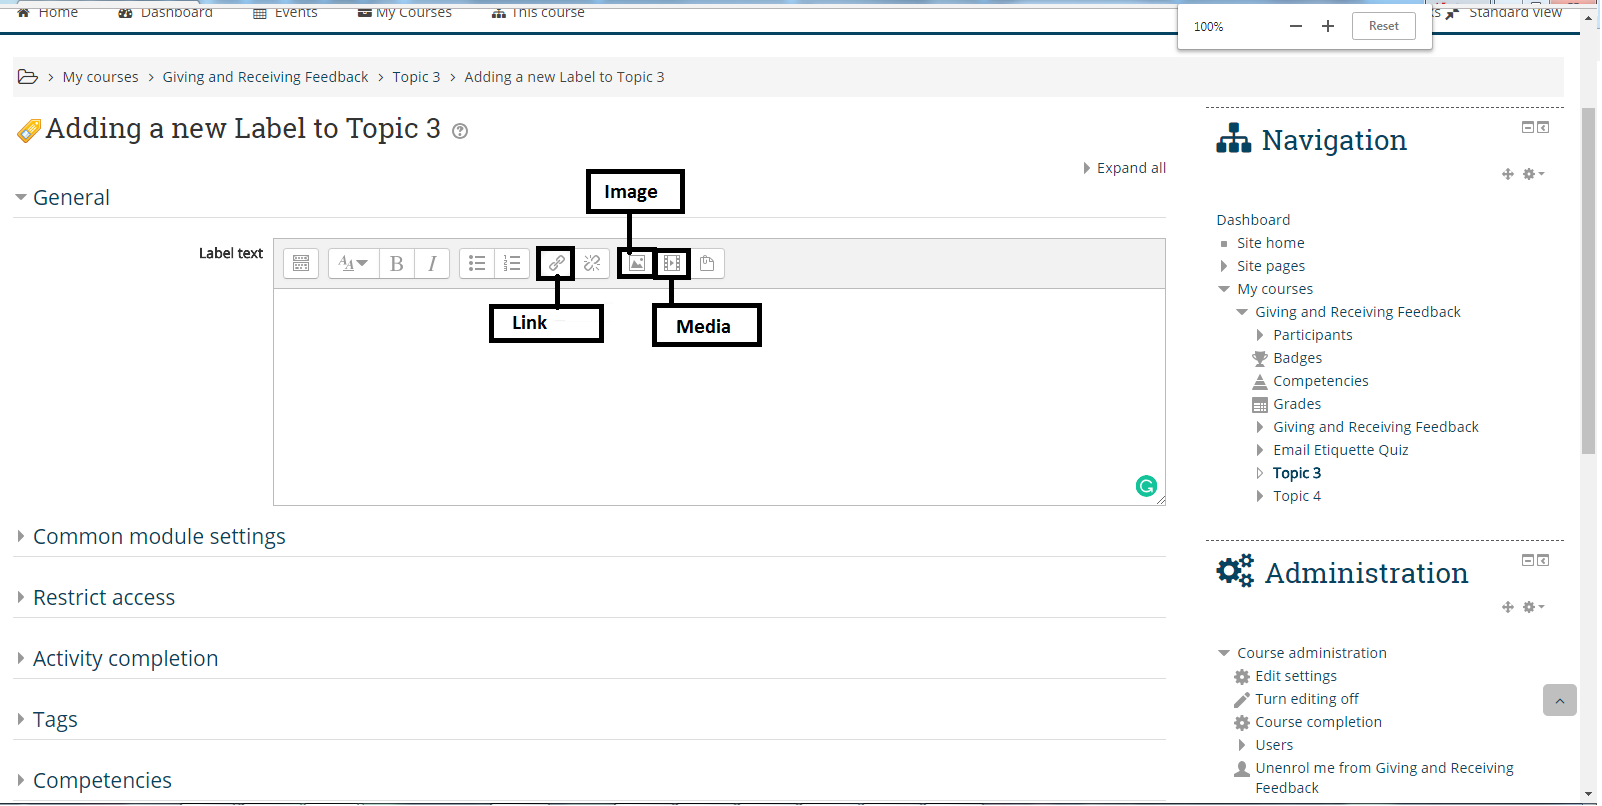
Click on the appropriate boxed in order to add Link / Image / Media to your label.
Step 5:
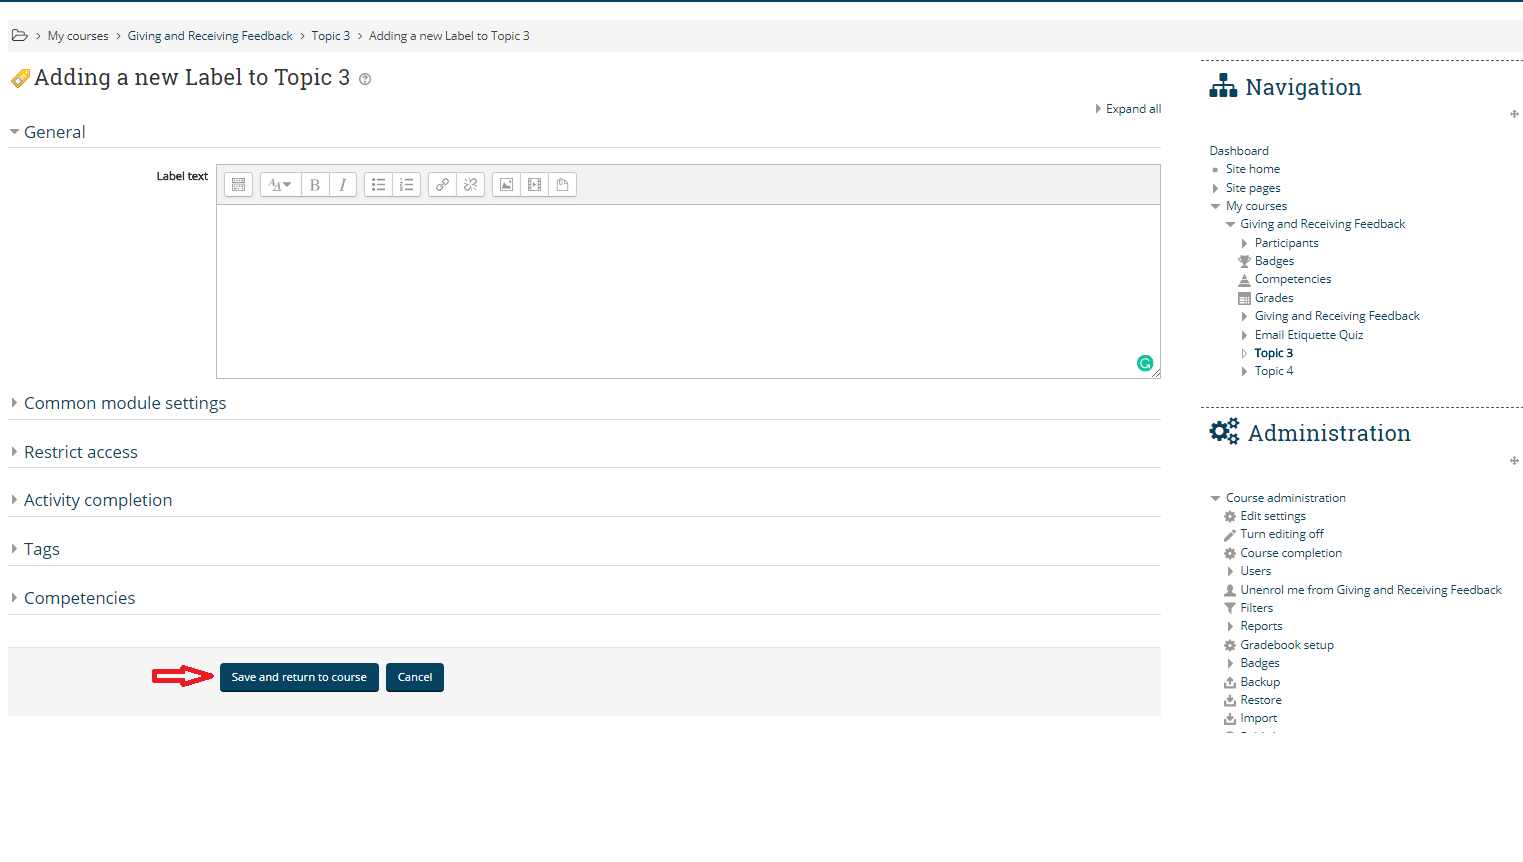
After including the label element, click on “Save and Return to the course” in order to save changes to the label.
I hope this blog gives you a brief insight on what are labels and how to use them in Moodle. If you still have any questions, feel free to contact us at hello@playxlpro.com