How to Create a Course on Moodle?
In Moodle, you can create a course in 10 easy steps. In this blog, I will be explaining you on how to create a course on Moodle LMS:
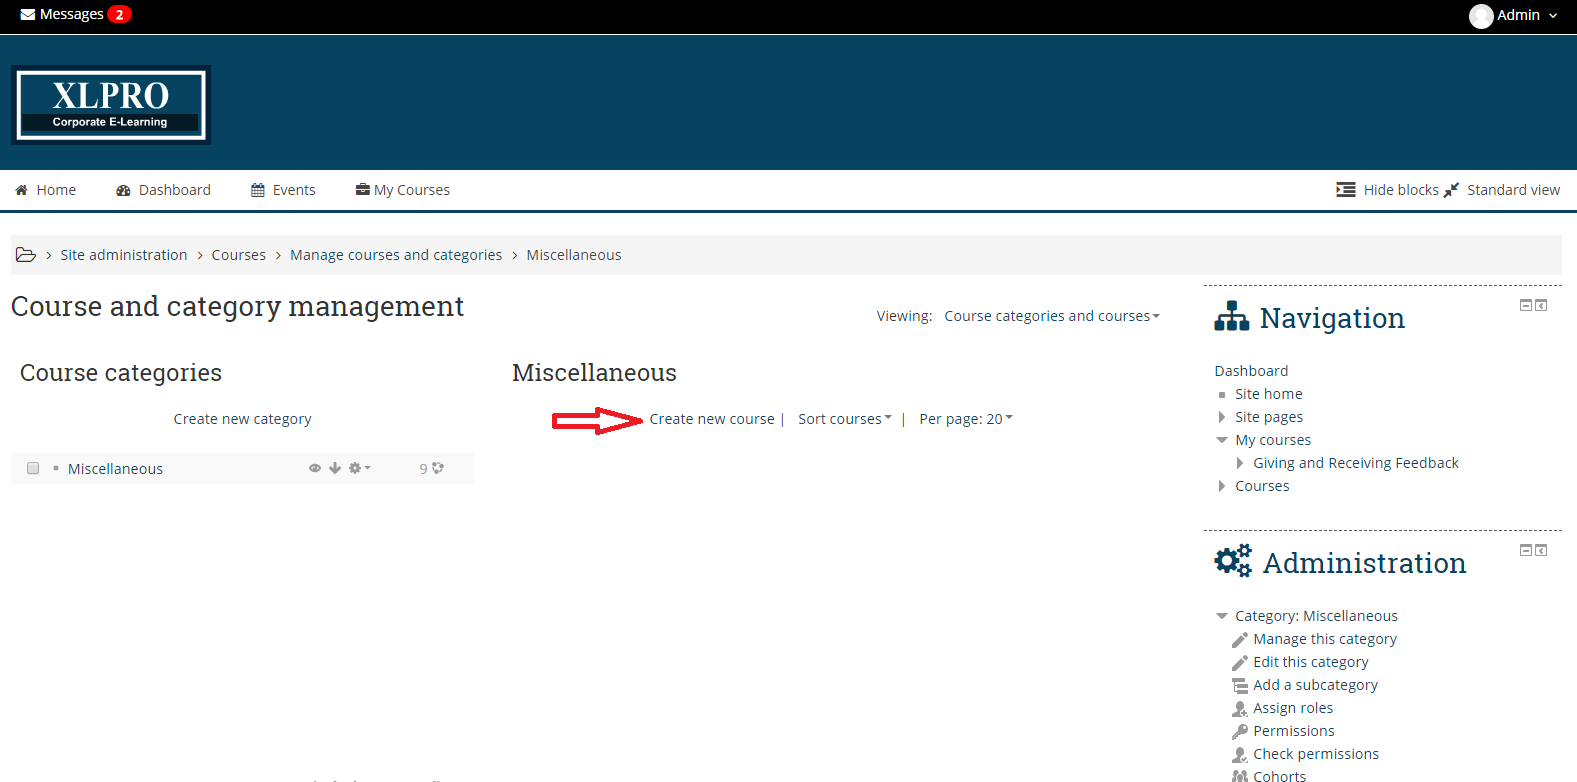
Step 1 : In the dashboard, under “Administration” option click on “Site Administration” and then select “Manage courses and categories”

Step 2 : Under Miscellaneous option, click on “Create new course” option.
Step 3 : After you have selected “Create new course” option, enter the course details such as Course name, category, ID Num, Description of the course etc.

Step 4 : If there is any course summary files, drag and drop them in “Course summary files” option and then click on “Save and Return”

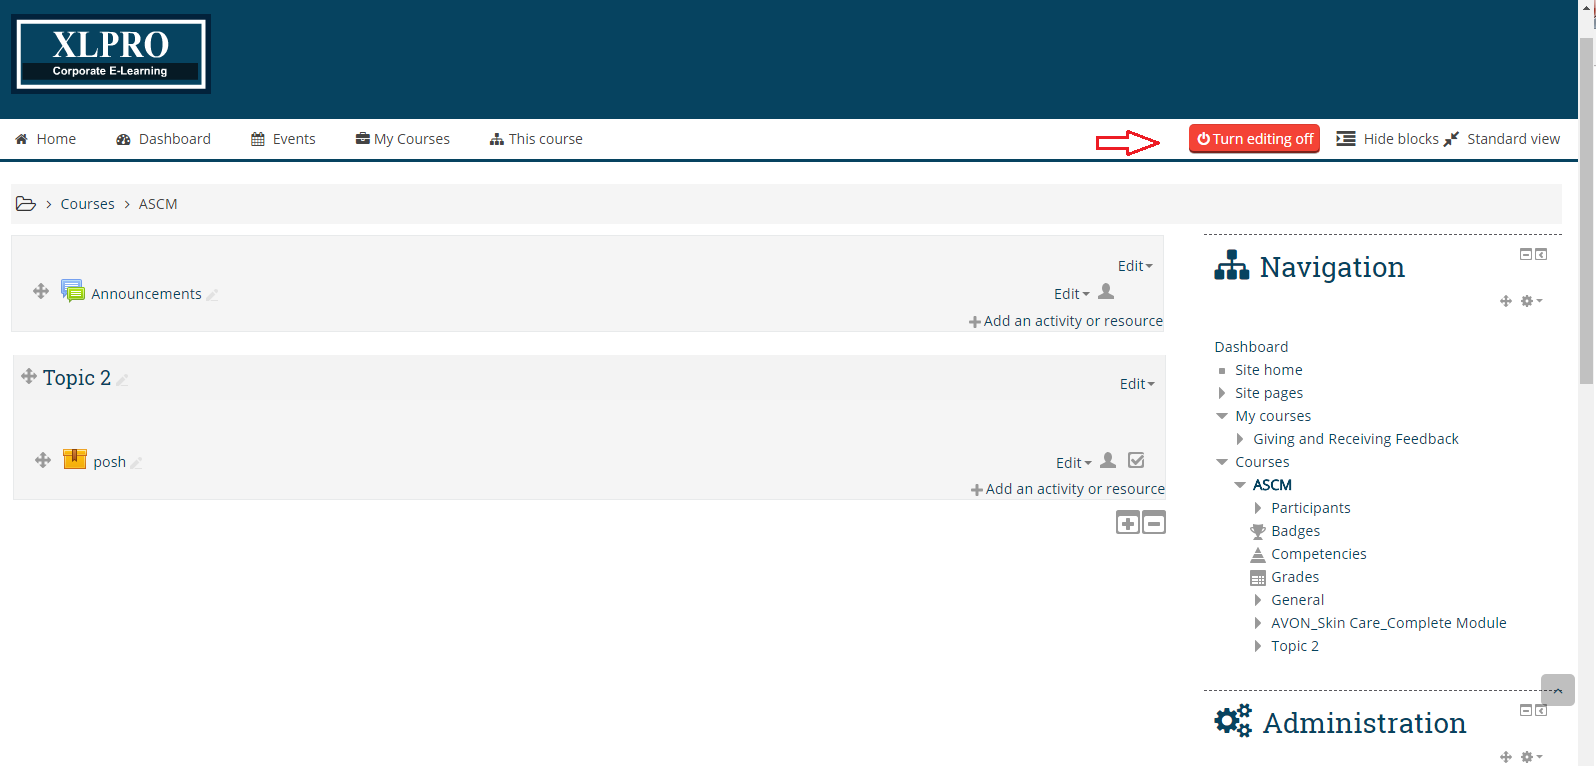
Step 5 : Click on “Turn editing on” option.

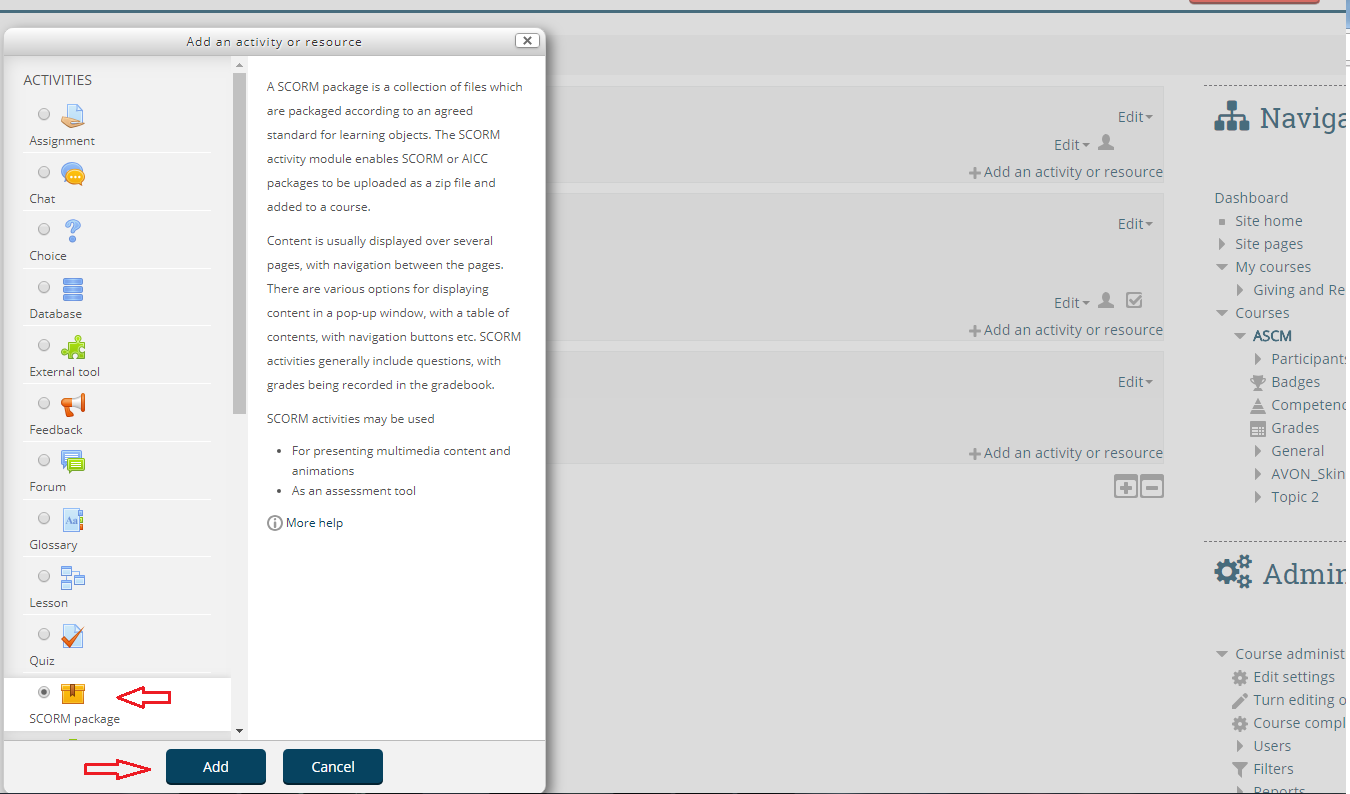
Step 6 : Now the course has been created, in order to input the SCORM package, click on “Add an activity or resource” option.

Step 7 : A Pop up box will appear, click on “SCROM Package” option and click on “Add” in order to add SCORM package.
Step 8 : Enter the SCORM package details such as Name, Description, Description on course page.

Step 9 : You can either drag and drop the files or upload the files from your hard disk. Wait for the SCORM package to be uploaded and once you have done editing the changes, click on “Save and return to course” option.

Step 10 : Click on “Turn Editing off” option and then you can see a new course created in your dashboard.
If you have any questions feel free to ask us at hello@playxlpro.com.